
If you want to understand the basics of live-streaming your games, this is the ultimate guide for you. We’ll review what equipment and software you’ll need, plus some tips to help you get the most out of your live streams.

Why live stream your games?
Simply put, fans want live-stream access. We saw a huge surge in demand for virtual events over the past year, but even as venues start to open back up there is no sign of it slowing down. What we’re learning is that the future of sports will be a hybrid model, with some fans attending games in person and others choosing to join from home.
Adding a ticketed virtual live stream of your event can boost your revenue and allow guests
- Who don’t yet feel comfortable attending an in-person event to participate;
- Who live far away to attend from their home state;
- Who simply prefer the experience of watching from home, where they can control the volume, temperature, and snacks.
While you can only fit so many fans inside your venue, revenue for virtual games is unlimited.
What you’ll need to start live-streaming
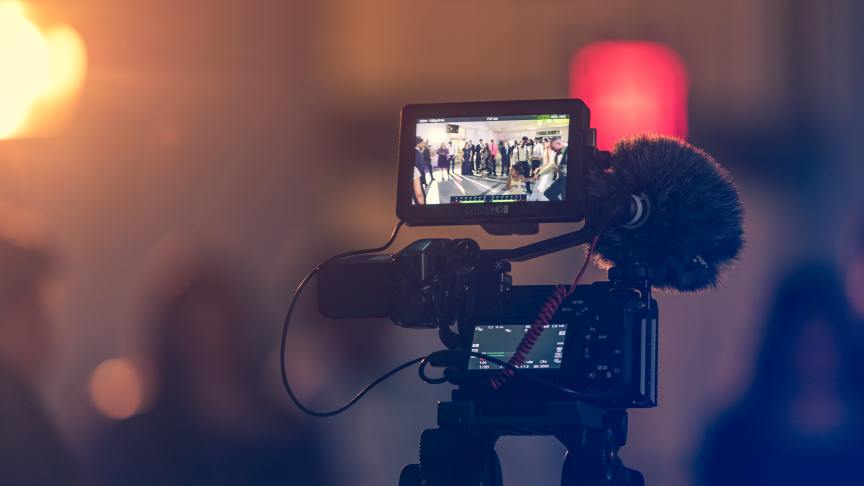
1. Video (and audio) equipment
You’ll need a camera and microphone to capture your live stream. The basic video source you need to start a live stream is a camera with a microphone connected. This could be as simple as a smartphone camera, or you might choose to invest in professional equipment such as DSLR or PTZ cameras. Some teams capture live video from two or more cameras which allows them to display side-by-side feeds from different angles on the field or switch between the cameras throughout the game.
Your video and audio source must be connected to a computer to live stream the content to the internet. Make sure you have an HDMI or SDI cable to connect your camera & mic.
2. Video Encoder
The encoder is the software or hardware which receives the video from your camera and sends it to your live stream. Some live-streaming platforms have simple built-in encoders while others allow you to plug in your own encoder for higher quality production.
A dedicated encoder will give you more power to produce your live stream such as switching camera angles, layering graphics over your video, and incorporating both live and pre-recorded video into your stream. A lot of teams choose to display sponsor messages during breaks in game play or include a banner at the bottom of the screen with the score.
We could write a whole blog about all the encoder options available and how to determine which one is right for you. In fact, we did! Check out our guide to live-streaming encoders below.
3. Streaming Platform
Your streaming platform is the destination where your encoder is sending your stream. This is where the video becomes available to fans watching from home. You’ve probably used a streaming service in the past: YouTube Live, Facebook Live, and Twitch are all free content delivery networks.
But those aren’t the only options out there. Professional streaming services give you much more control over how your stream is presented, who has access to it, and how it is monetized. With Passage, for example, you can monetize your stream by charging for virtual access and accepting donations during your live stream. Even if you allow fans to join for free, you’ll still get all of their contact information so you can keep in touch with them throughout the year.
4. Internet Access
You’ll need a stable connection to the internet to stream your games live. Some teams choose to simply record their games and offer access the next day, but we generally recommend allowing fans to tune in as the game happens. There’s something exciting about seeing a sporting event live, as it happens. Fans who can’t attend “live” could still be given the option to watch a re-stream at their convenience.
How to get set up
Although livestreaming is simple enough for anyone to do, it’s not quite as easy as opening up your laptop and hit a “go live” button. You’ll want to put some planning and effort into making your virtual event special, just like you would if you were hosting an in-person event.
Here’s how to set up your virtual event’s live stream on Passage in a few simple steps:
1. Create an Event
The first step in putting together your virtual event is to create a normal event, with at least one ticket type and timeslot. This allows you to start selling tickets online. You can sell in-person and virtual-access tickets to the same event, allowing fans to attend in person or join from home.
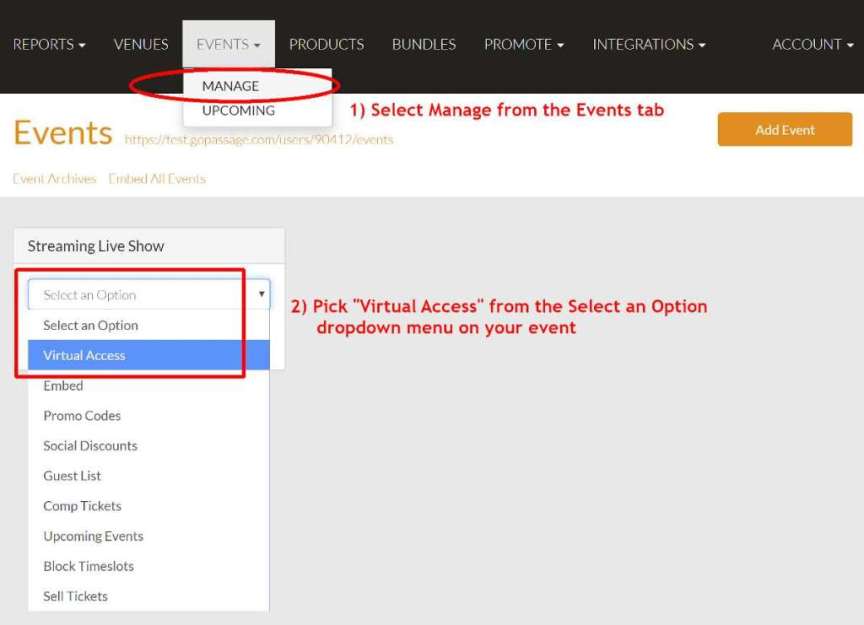
2. Add Virtual Access
Once your initial event is set up, head over to your Manage Events admin page, open the “Select an Option” dropdown menu on the event, and select “Virtual Access” from the list. This takes you to the form to set up your virtual event page.
In the “Description” section, add any details you’d like to include on the page along with the live stream. Your description will display below the embedded content. You can include text, images, or links.
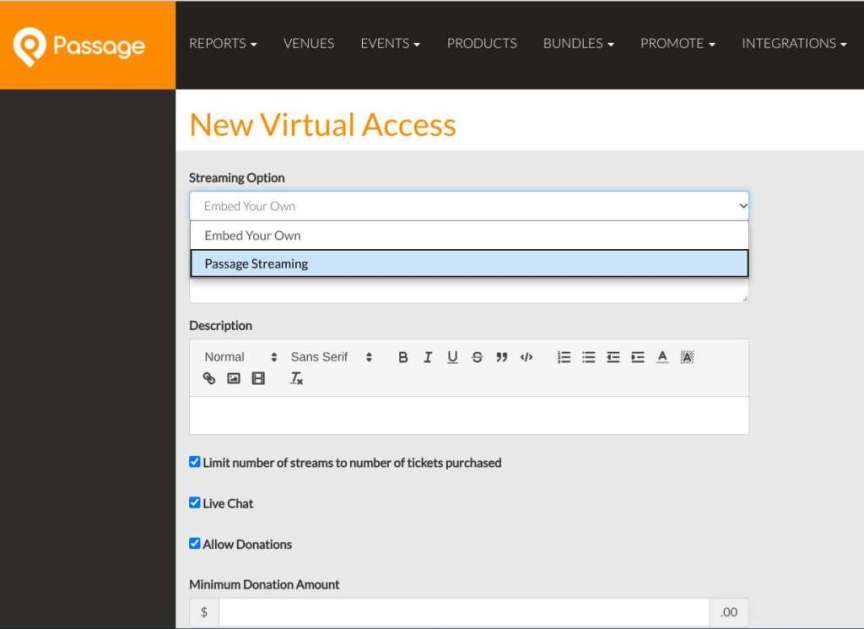
3. Choose Your Streaming Service
The simplest option is to use Passage’s built-in streaming platform. When you select this option, you’ll have fewer technology components to manage, no embed code to copy over, and everything will be on one platform. Passage Streaming can support up to 1080p HD streaming to make sure you also have the best stream quality possible!
4. Grant Access
The final step before you go live is to enable the ticket types which can access your live stream. This step also allows you to sell both in-person and virtual tickets for the same event.
Ticket types selected here will provide a link to the virtual event page when purchased. For example, you can sell a ‘General Admission’ ticket type (not selected) for people to attend the show in person, and an ‘Online Admission’ (selected) for people who cannot attend or who would prefer to watch from home.
Need help getting set up? Talk with an event expert on our support team, or schedule a demo to see how Passage can work for your team.
Pro tips to help you get the most out of live-streaming
1. Set the right ticket price
One of the most common questions we received from sports teams is “How much should I charge for virtual access?”
It’s a tricky thing. Will fans be willing to pay the same price they did for in-person events? Probably not. But your costs won’t be the same, either. How, then, do you find that happy medium where fans see the value and you’re able to make a profit?
If you’re unsure what price point your fans are willing to pay, let them decide! Pay-What-You-Can Pricing is a great option for teams who are just getting started with livestreaming, and for anyone who wants to offer fans access on a sliding scale; each ticket purchaser gets to decide what’s affordable for them.
For more tips on how to price your live-stream access, check out our guide below.
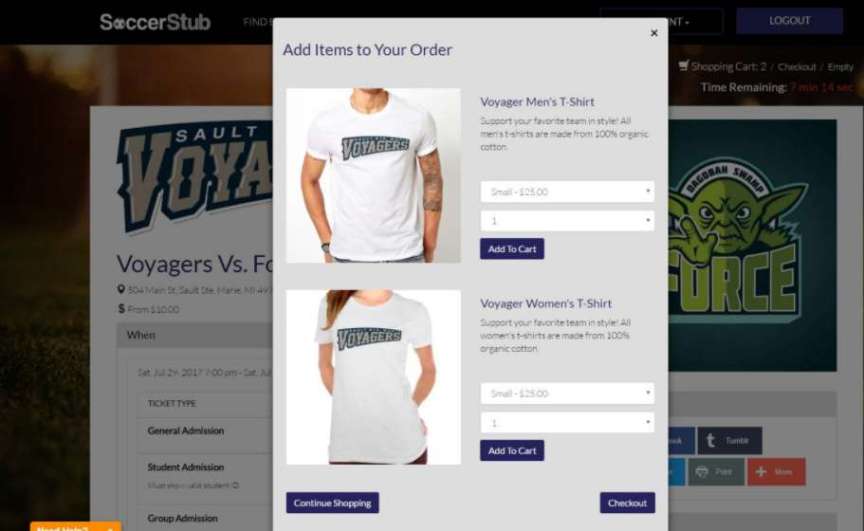
2. Add Product Upsells
Invite customers to add on fan gear or other merch when they purchase access. The best time to offer an upsell is before your event even starts: do it online while fans are purchasing their tickets. This is effective for two reasons:
- It reaches guests when they already have their wallet out. They are planning to spend money on your event, you’re just inviting them to spend a little more, if they choose to do so. Guests are more likely to spend more money online.
- It gets you additional revenue in advance of your event; you get your money earlier which can help cover some of the costs of planning and setting up your event.
For more information about upsells and add-ons, read the story below.
3. Secure your stream
If you’re considering livestreaming your games, your first thought might be to pull out a phone and open your YouTube app or Facebook Live, but that would do both your team and your fans a disservice. Secured livestream access is key to building your fanbase and providing your fans with the best possible gameday experience (and if you’re partnered with Passage, there’s ZERO cost to your team).
With Passage, you can still broadcast to multiple streams or make access free, but you’ll get all the fan registrations for your game so you can keep the conversation going after the livestream ends.
4. Enable Instant Donations
Fans can donate any amount during your livestream in just two clicks using payment information they already have saved on file. Encourage a $6 donation to show support every time your team scores a touchdown, or invite them to make a donation equal to the jersey number of their favorite player. Maybe they can help select this week’s player of the game.
5. Add Virtual Season Passes
Fans love season passes. Securing access to every game during the season gives them the flexibility to attend whenever they want, without worrying about getting stuck when a game sells out: they already have their tickets.
Season passes can work for live-streaming, too! Instead of just offering live-stream access game by game, give your fans the option to subscribe for the whole season, perhaps at a discounted rate or with special perks just for live-stream subscribers.
Learn more about subscriptions, for live-streaming or in-person access, in the guide below.
Need help setting up your game’s live stream? We’d love to help! Set up an onboarding call with our support team, or schedule a demo to see how it works.